We make the first toy for the baby with our own hands. Bunny pattern for comfort and step-by-step instructions. How to sew comfort: a detailed video master class
Comforter, scops toy, hug toy - this is your child's first toy. Usually, the mother holds her near her breast during feeding, so that she is saturated with the smell of milk, and then puts her in a crib or in a stroller to the baby. Thanks to this, children fall asleep with comfort much faster and more calmly, and with age, this toy becomes the baby's best friend. Lightweight and compact "scops" is convenient to carry around the apartment and take it outside. Today in stores there is a huge selection of comforters, but we suggest you do it yourself. It does not require any special cutting and sewing skills, and will only take a few hours of your time.
What you need for comfort
The child's first and most beloved toy will also become the first "rodent" for him. The kid will definitely pull it into his mouth, it will have to be washed often, so for manufacturing it is better to take a reliable fabric that is not subject to deformation. For the back and head of the toy, you can choose fleece: it is soft, light, pleasant to the touch and at the same time quite durable. And for the tummy, we take natural cotton with a contrasting and bright print.
It is best to use holofiber as the filler that we will use for stuffing the head, legs and ears. It is hypoallergenic, suitable for children from the first days of life, and at the same time does not "go astray" like cotton wool. In addition, you will need black floss threads, with which we will embroider the eyes and nose of our toy.
The sizes of the toy can be very different, just do not make it too large and voluminous. The best option for comfort is 25-30 cm. Below is a pattern for 2 A4 sheets. It can be downloaded, printed on a printer in a 1: 1 size and transferred to fabric. The pattern already has 1 cm seam allowances

Pattern for the head and ears of a bunny-comfort / open sources

Pattern for the torso of a comfortable bunny / open sources
Bunny-comfort: step by step instructions
For the toy, we need three parts of the head (fleece), four parts of the ear (2 from fleece, 2 from cotton) and two parts of the body (1 from fleece and 1 from cotton). The pattern shows half of the torso detail, so fold the fabric in half while cutting.
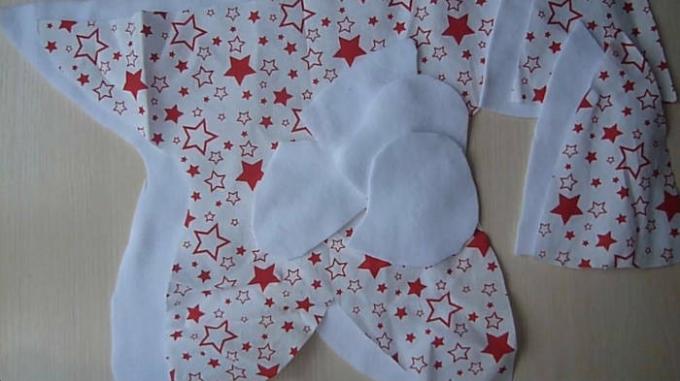
We transfer the pattern to the fabric / YouTube
We start sewing the bunny from the ears. We fold two parts of the eyelet made of different fabrics face to face and grind on the sewing machine. We make notches around the perimeter of the pattern (so that the parts are easily turned out and the seams do not wrinkle when stuffing). Remember that the notch should not extend to the seam by about 2 mm.

Getting Started Sewing Ears / YouTube
In the same way, we grind the body parts face to face, leaving a small hole in the area of the legs for turning and stuffing

Sewing the torso / YouTube
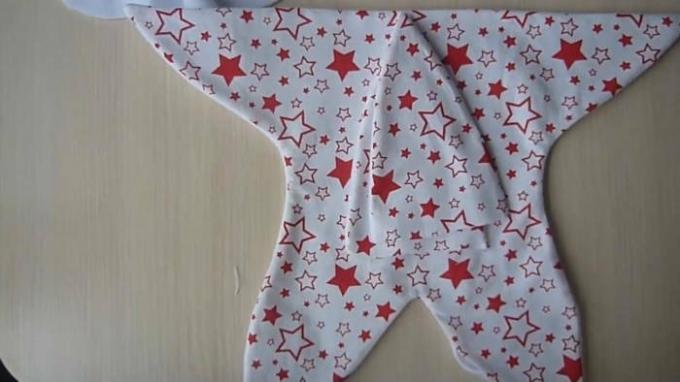
Turning out and ironing parts / YouTube
Take one piece of the head and put it face up. The triangle is our future nose.
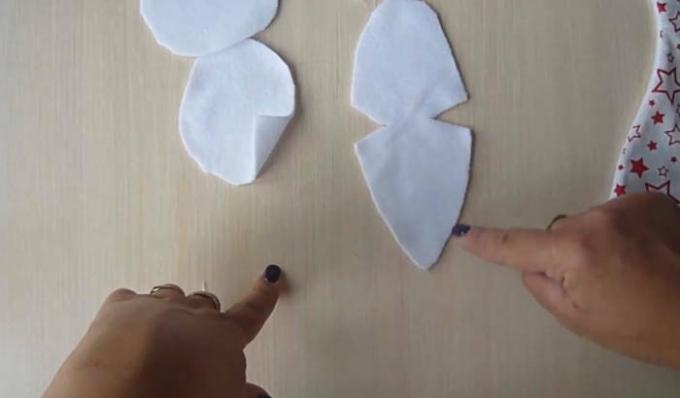
The triangle will be the nose of the bunny / YouTube
Fold the ear from the edges to the center.

Fold the ears / YouTube
We attach the eyelet to the cut on the pattern. In this case, the front side of the ear should look at the spout.

We put the ears in a special slot / YouTube
We insert our part into the dart and lay a line on the sewing machine. We do the same with the second ear, and also lay a line. It is better to lay two lines on each side to secure the ears more firmly.

Sewing on both ears identically / YouTube
Now we take up the eyes of the bunny. We draw an eye on one part of the head and transfer it to the second part. We take the threads of the floss and embroider the eyes on both parts
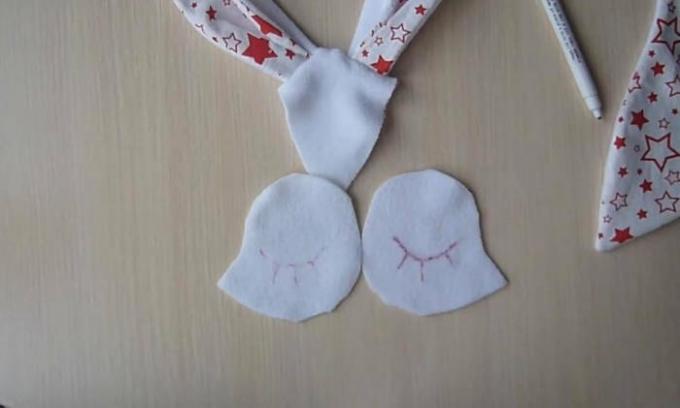
Draw eyes on the sides of the face / YouTube
All parts of the head are ready for stitching. We chop off the side details with eyes with needles face to face from the nose to the ear on one and the other side of the triangle. We lay the line on the sewing machine. How to do it correctly, you can watch the video below.
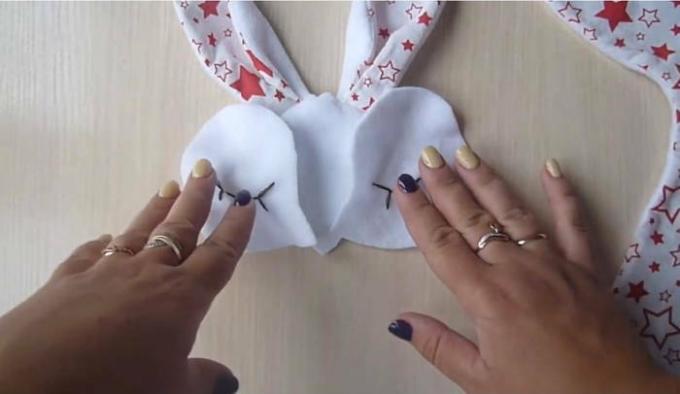
We lay out the details on the sides of the triangle and sew / YouTube
Sewing the three parts together on the sides, we lay a line from the nose to the neck, leaving a small hole for stuffing the head
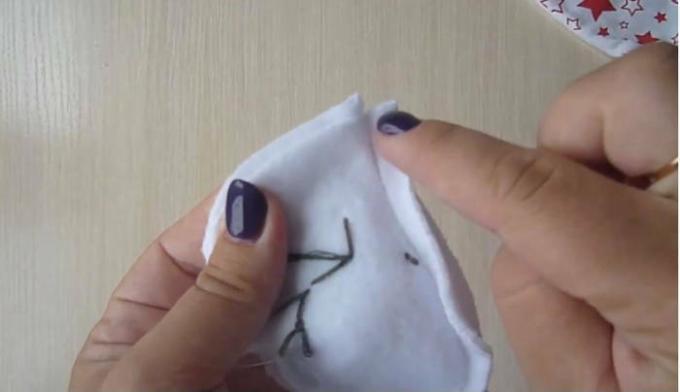
You need to leave a hole on the head for stuffing / YouTube
We fill the head with holofiber, and we try to do it tightly enough.
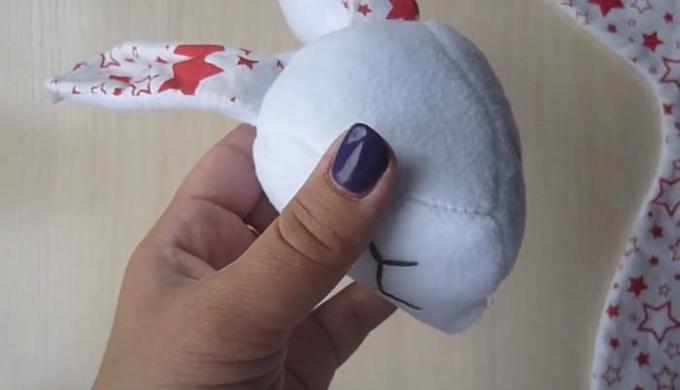
We fill our head tightly with holofiber / YouTube
Now our head is ready for the final touch: with the help of a floss, we embroider a nose in the area of a triangle, at the tip of the hare's face.
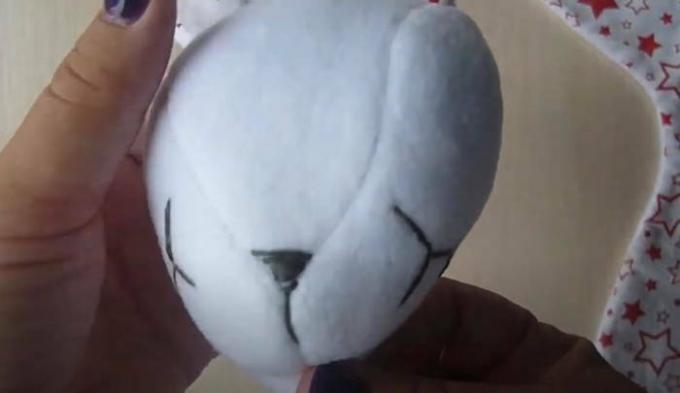
We embroider a nose / YouTube
We make a knot and sew a hole for stuffing with a blind stitch. The hardest part of the toy is ready.
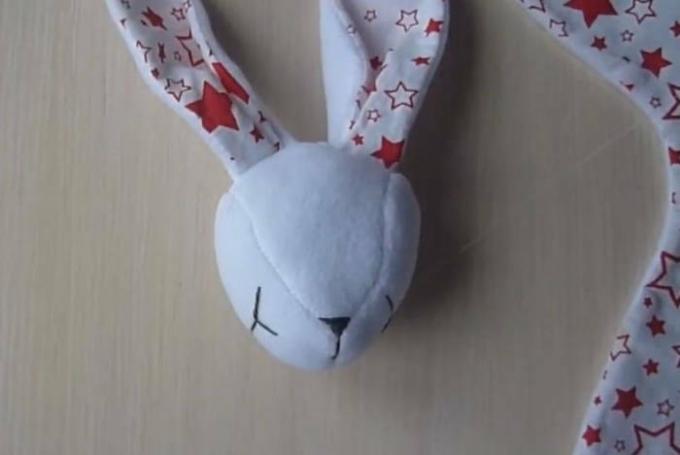
Head ready / YouTube
We make legs on the body. Through the hole in the area of the legs, which we left for stuffing, we place a little holofiber in one of the ends of the body and form a soft volumetric foot.

Making legs on the body / YouTube
The foot must be secured with a thread. We insert the needle from the inside so that the knot is not visible, we make a couple of large stitches and wrap the foot with thread several times.

The paws will also be from holofiber / YouTube
In the same way, we form the other three legs, and sew a hole on the body with a blind stitch.
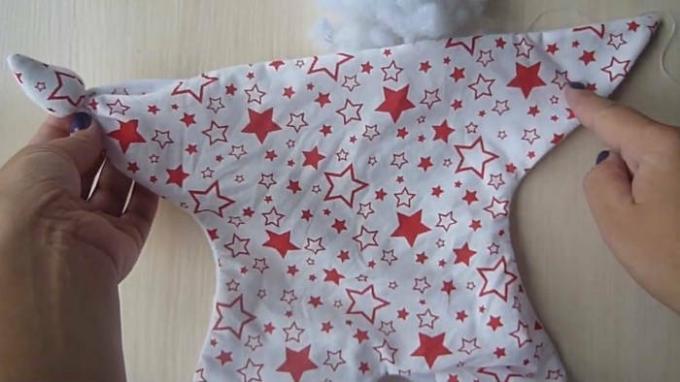
Forming four legs identically / YouTube
Our body is ready, it remains to assemble the parts together. We fold the body in half, look for the middle and sew the head to this middle. We sew with blind stitches to both the front and back half of the body.
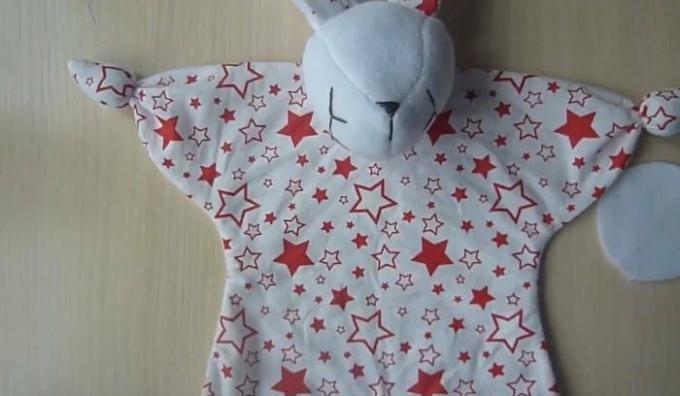
Sewing the head to the body / YouTube
The bunny is almost ready, it remains to sew on the tail. Cut out a small circle from the fleece, sweep it around the edge, fill it with holofiber and tighten it with a thread.
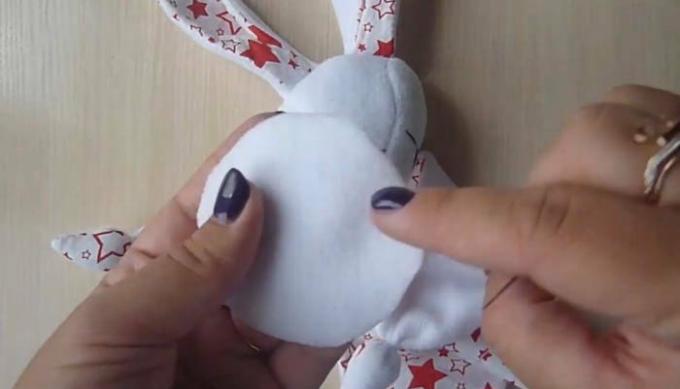
Shaping the ponytail / YouTube
Sew on the tail on the back of the body just above the opening between the legs.
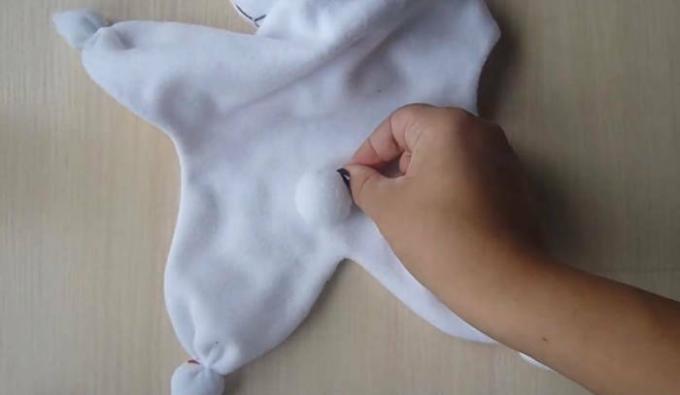
Sew on the tail from the back / YouTube
Our bunny is ready to go to its little master.

Bunny is ready / YouTube
You will also be interested to read:
How to make a knitted rattle with your own hands: step by step instructions
How to play with a toddler under one year old: tips for every month

