Autumn leaf appliques can captivate both kids and schoolchildren. We offer you craft ideas for children of different ages: from a simple hedgehog to a portrait of leaves
Working with any natural material is very useful for a child. It develops imagination and fine motor skills, soothes and helps to concentrate. We recently wrote about what kind of original crafts you can make from chestnuts and acorns. Now it is the turn of the appliqués from autumn leaves. With the help of multi-colored leaves, you can create a real masterpiece that you are not ashamed to present to your grandmother or hang on the wall. The main thing is to collect as many different leaves as possible and do not stick too much to the template. Give your child room for imagination: let him choose which leaves are best for each particular craft.
How to dry fall leaves for crafts
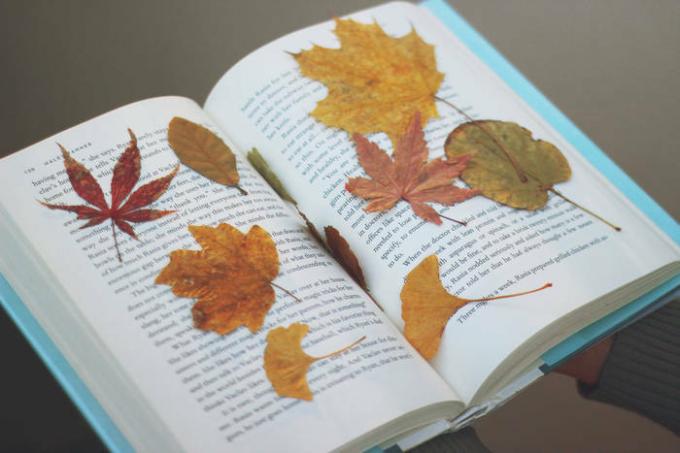
Most often, the leaves are dried between the pages of books / open sources
Any craft made from autumn leaves requires preliminary preparation. On the "hunt" you will have to go at least twice: to the park or the forest, and to the stationery store. In the forest, give your child a task - you need to collect a variety of leaves. The greater the variety of shapes and colors, the more options for crafts you can create with your baby without the help of scissors.
After the main "ingredient" for the crafts is found, it must be properly prepared. It will be inconvenient to make an applique from "fresh" leaves. First, they do not adhere well to paper. Secondly, as moisture evaporates, they will change their shape, curl and shrink. Therefore, the child's work will soon be ruined.
The leaves must be dried under a press so that they retain their flat shape. This is usually done by neatly folding them between the pages of a book or magazine. If there are a lot of leaves, the book should be pressed down on top with something heavy and left in this position for several days. Usually this "drying" takes about a week. To speed up the process, it is tedious to change wet paper to dry every day - that is, transfer the leaves to another book.
If you do not want to wait long, and the child asks to sit down at the craft today, you can dry the leaves with an iron. To do this, lay out the natural material on paper, cover it on top with another paper layer and iron with an iron until the moisture from the leaves evaporates completely. This "express drying" perfectly retains the shape of the leaves. True, after it they become a little more fragile than after natural drying.
You can make a variety of crafts from the leaves, from flat appliqués to voluminous ikebans. However, kids usually like the first option better. Therefore, you will also need to prepare colored cardboard (for the background), colored paper (for details), pencils, scissors and PVA glue. If the stationery sells ready-made plastic "eyes", take several pairs: they really liven up the craft. If not, you can make your own eyes from colored paper or rowan berries.
Autumn Leaves Hedgehog
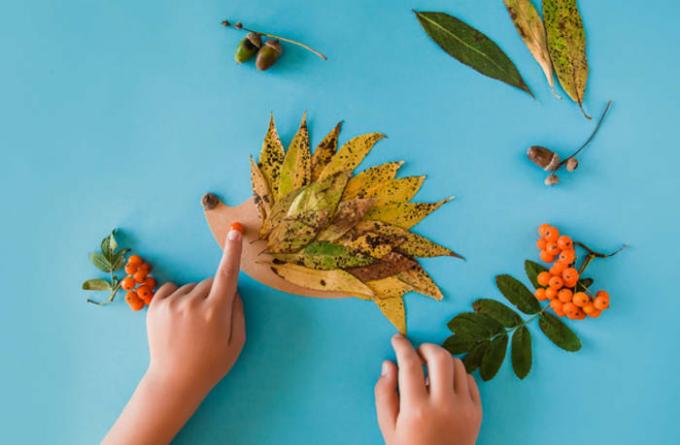
Thin willow leaves are good for hedgehog needles / istockphoto.com
With the help of autumn leaves and rowan berries, you can make a wonderful hedgehog. All you need is to cut the animal's body out of colored paper (as an option, draw it on a background sheet of paper). And then give the child the opportunity to fantasize about what the thorns can be made of. Jagged leaves, for example, maple leaves, “fit” very well on the back of a hedgehog. Two or three pieces are enough, and the animal can already boast of a prickly fur coat.
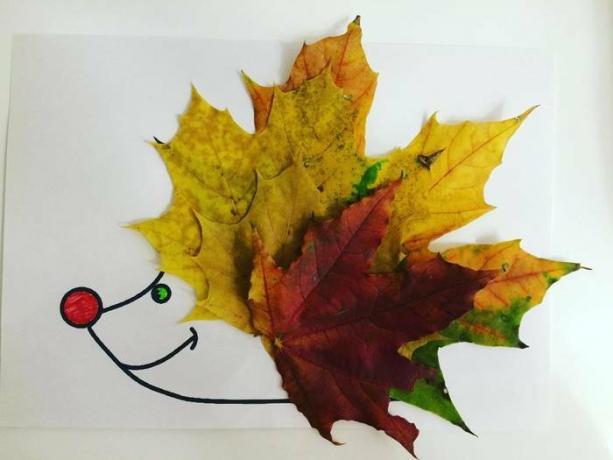
For a simple hedgehog from autumn leaves, a few leaves are enough / open sources
However, any leaflets will do here. The main thing is to glue them with a sharp tip up.
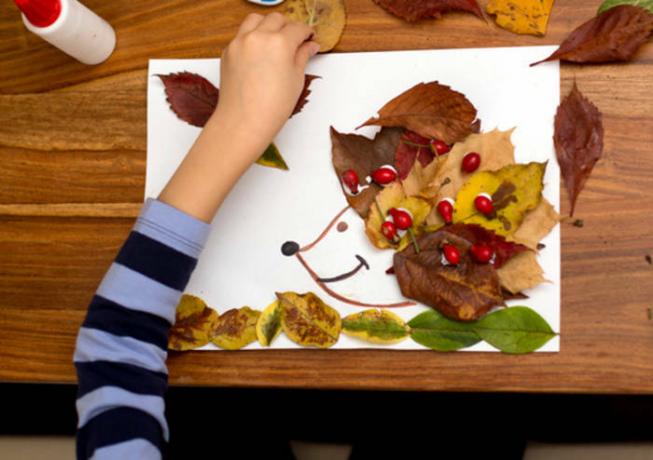
The spiky coat of a hedgehog can be arranged from any leaves / istockphoto.com
But willow leaves really look like thin sharp needles. True, to lay them out beautifully, you need a little patience and perseverance.

Thin willow leaves are good for hedgehog needles / istockphoto.com
You can “fantasize” an autumn landscape for a hedgehog: a tree made from a thin twig of an aspen, a tree made of thuja or juniper needles, a mushroom made of colored paper. This will make your craft look like a real painting, which can be hung on the wall or attached to the refrigerator.
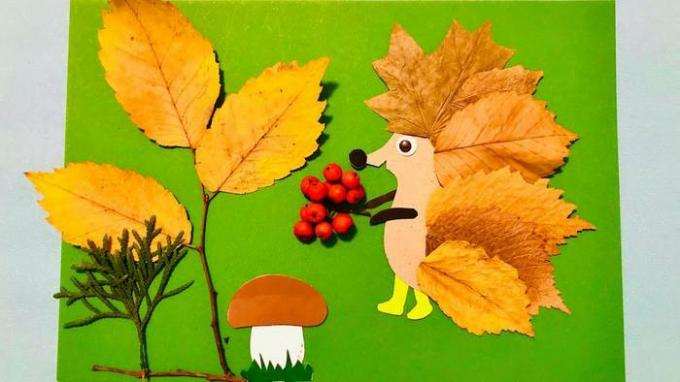
Together with a hedgehog from the leaves, you can make an autumn landscape / open sources
Owl made from autumn leaves
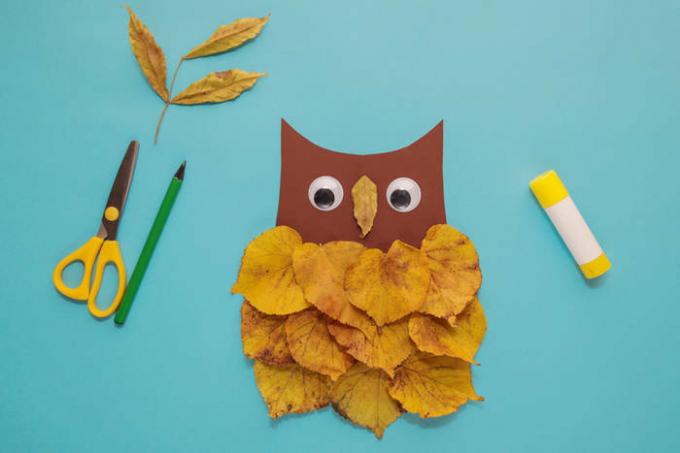
An owl made from autumn leaves looks very cute / istockphoto.com
The easiest way to make an owl from autumn leaves is to use a blank for the body of colored paper. As in the case of the hedgehog, we give the child a base and suggest to “dress” the owl in multi-colored feathers.
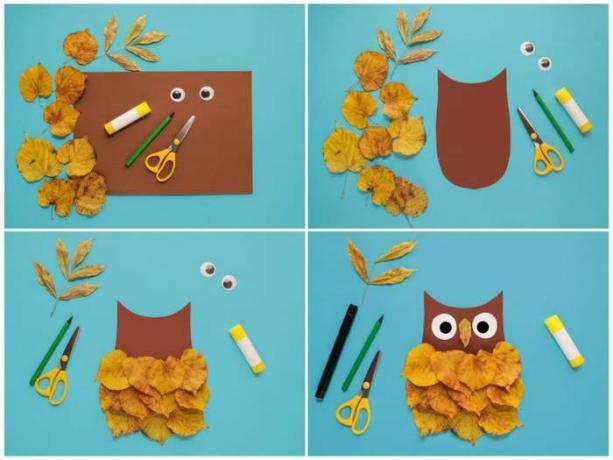
How to make a simple owl from autumn leaves / collage kolobok.ua
However, you can give free rein to children's imagination and offer to assemble an owl from leaves completely. To do this, three large leaves (one oval and two oblong) are enough for you - this is the body and wings. Do not forget to attach a couple of small leaves to the top of the body with a sharp tip up: these are the "ears" of an owl, which will immediately make the craft look like the bird we need.
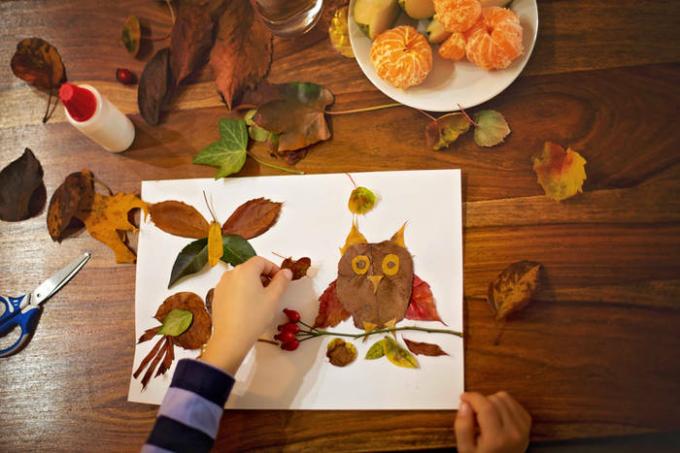
Owl can be composed of leaves entirely / istockphoto.com
But this option is for the joint work of a mother and a child, or for very assiduous and patient children. But the result of painstaking work is incredibly similar to a real live owl. You will need to draw the outlines of the owl's body on paper and "lay out" it with small aspen leaves. You need to start from the bottom up so that the leaves overlap and imitate the plumage of a bird.
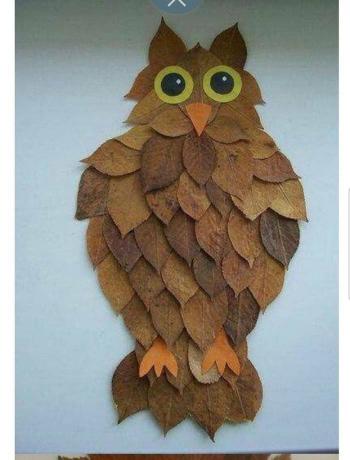
Such an owl made from autumn leaves will require painstaking work / open sources
Peacock from autumn leaves
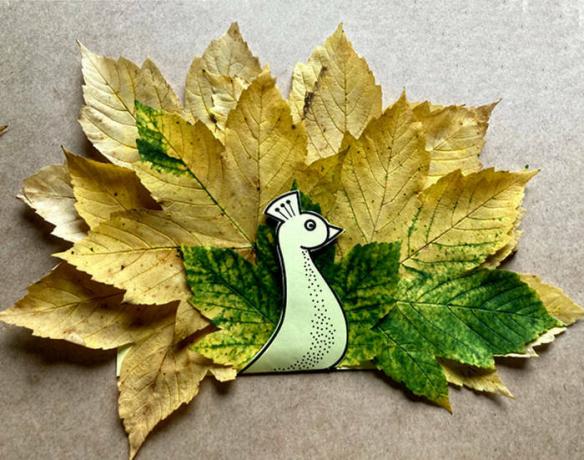
A simple peacock made from autumn leaves can be done even by a baby / open sources
A peacock made from autumn leaves looks very beautiful. Here, too, there is a simple version of the applique designed for toddlers, and more complex work for older children. For a simple craft, you will need a few "paw" maple leaves (preferably of a different shade) and the body of a peacock - you can make it out of colored paper, or ask the child to mold it from plasticine.
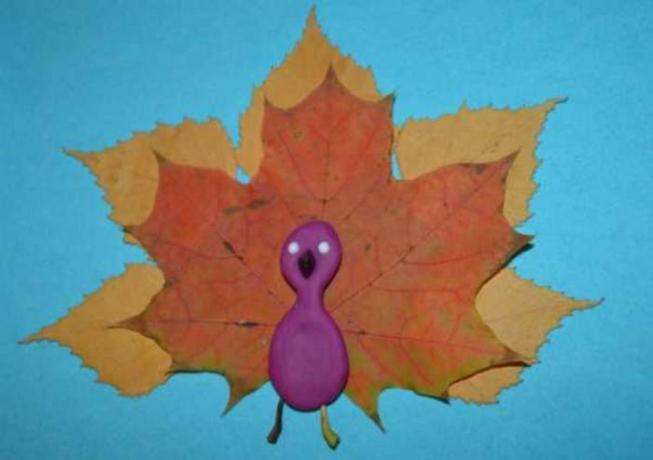
The body of a peacock can be molded from plasticine / open sources
More intricate appliqués suggest that the peacock's tail can be decorated. Look at a photo of a peacock with your child on the Internet, pay attention to how the tail feathers look, to their characteristic pattern in the form of an "eye". Think about how you can lay out such a pattern of leaves and get down to creative work.
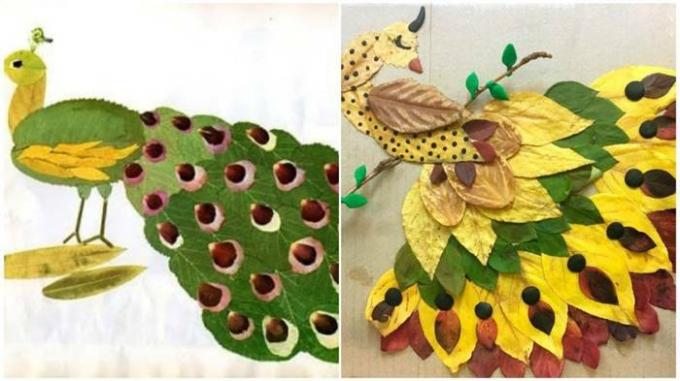
Such a peacock made of autumn leaves will require patience / collage kolobok.ua
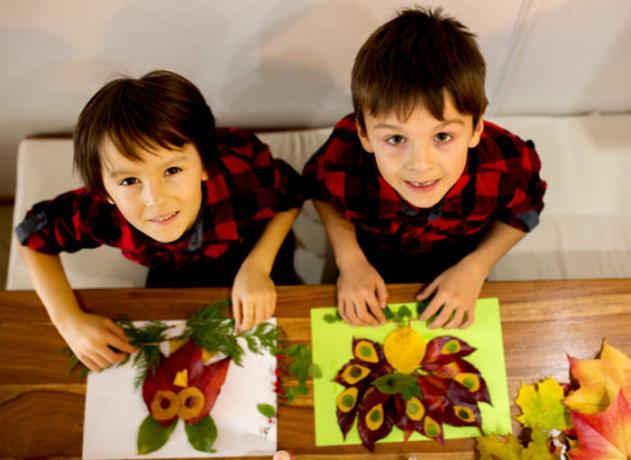
Crafts from leaves are loved by children of different ages / istockphoto.com
Portrait from autumn leaves
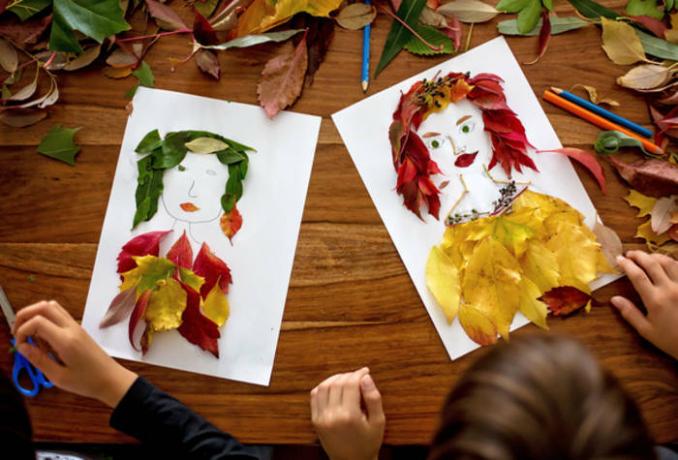
A portrait of autumn leaves will decorate any home / istockphoto.com
The portraits "painted" with the help of autumn leaves look very original and unusual. Together with the child, you can create a whole picture gallery, and make portraits for all family members. Let the child (or with your help) draw himself, mom, dad and other relatives, and try to depict their everyday hairstyles with leaves.

Autumn leaves can be used to compose a real portrait gallery / open sources
Older children can be encouraged to use the leaves not only for hairstyles, but also for decorating jewelry or clothing. Silhouettes created using this technique look very strong, original, and will decorate any apartment.
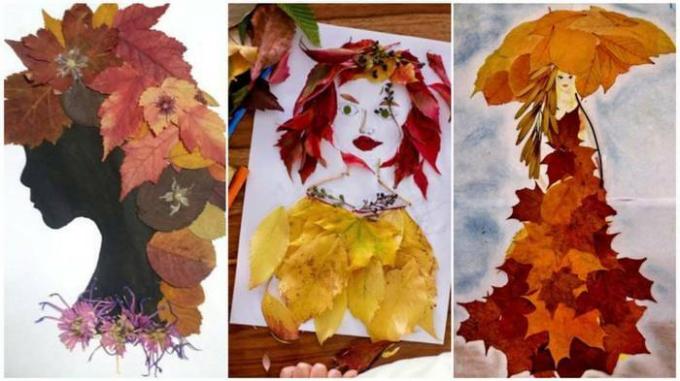
Such a portrait of autumn leaves looks very elegant / collage kolobok.ua
You will also be interested to read:
Autumn crafts: we make animals and gnomes from leaves - a master class
What can be made from a nutshell: 25+ crafts - master class

